Ratschläge und Antworten vom Day Off Team
Drucken
2.1. Add Employees
VeröffentlichtDezember 27, 2022
AktualisiertSeptember 16, 2024
Bydayoff
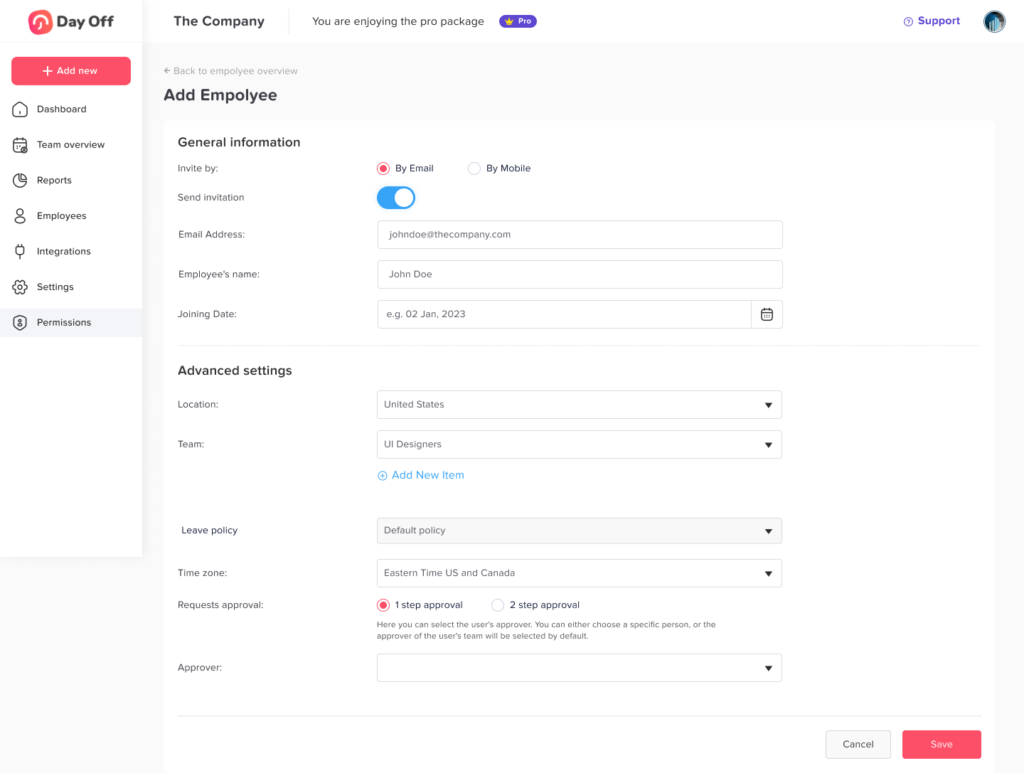
The first way to add employees is to add them individually one by one, click “Add employees”, then you will be directed to a page to add the employee’s information which are:

General information
- Employee’s email or phone number
- Employee’s name
- Role, the default role is “Employee”, but you can select the “Admin” or any other custom role.
Joining date
- You can add the employee’s joining date/hiring date as information in the employee’s profile, and their balance will be based on the company’s global reset settings.
- If enable the “Reset balance every anniversary” option, the employee’s leave balance will reset on their anniversary date.
Advanced settings
- Location: employee’s location determines their working days and official holidays, and they will get the policy of their location by default.
- Team: the team is optional, it defines the employee’s approver and policy if the team has a customized policy.
- Leave policy: by default, the employee is assigned to their location’s or team’s policy, but you can use this to assign a different leave policy to the employee.
- Time zone: by default the time zone of the selected location, but you can change it if required.
- Approvers: you can set up to two approvers for each employee, both approver must accept leave requests.
Send invitation
- After you finish adding the employee’s information, click “Save.“
- The employee will receive an invitation email to join the company account, the email includes their username and a temporary password that they will use to log in for the first time.
- In case this employee exists in different company account, he will also receive an invitation and he will be able to switch between different company profiles.
- In case of adding employees with phone numbers, the invitation will show for the admin, where they can share the temporary password with the employee.
Table of Contents