Archives: Knowledge Base

  • Slack Integration

    Integrating Day Off with Slack

    Step 1: Access the Integration Section

    • Log in to your Day Off account.
    • Go to the “Integrations” section, found in the left-side menu.
    • Find the Slack integration — look for the Slack logo and a button labeled “Add Integration.”
    • Click the “Add Integration” button. You’ll be redirected to a page where you can log in to your Slack workspace.

    Step 2: Authorize Day Off to Access Slack

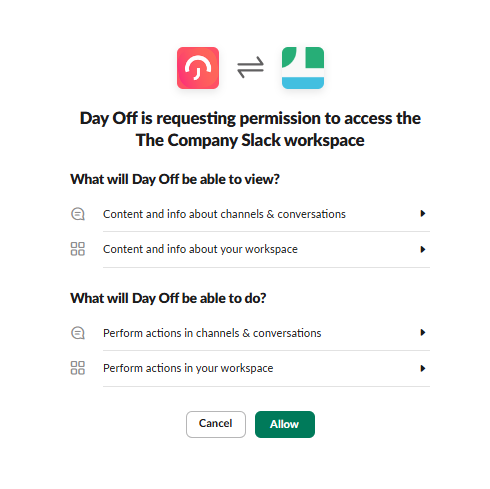
    • A permissions page will appear, asking for authorization for Day Off to access your Slack workspace.
    • Review the requested permissions, which outline what information Day Off can access (like basic channel details) and what actions it can perform in your channels, conversations, and workspace.
    • Click “Allow” to confirm. This step grants Day Off the permissions it needs to manage leave requests and send notifications through Slack.
    Step 3: Import and Link Employees

    • Import Employees from Slack: Import employees from Slack who aren’t in Day Off to keep your database up-to-date.
    • Link Existing Employees: Link employees with matching emails in Slack and Day Off to ensure complete integration.

    Step 4: Configure Daily Digest Settings

    • Set Up Daily Digest: Choose how the daily digest should display in Slack, showing who is off each day.
    • Choose Notification Time: Select when the digest will be sent to the designated channels.
    • Customize Information: Decide which details (like names and leave types) to include for team visibility.

    Step 5: Configure Official Holidays Digest Settings

    • Enable Reminders: Turn on the Official Holiday Reminder toggler.
    • Set Channels: Choose a Slack channel for reminders for each location.
    • Reminder Timing: Reminders will be sent one working day before the holiday date.

    Step 6: Submit Requests and Track Status

    • Request Time Off in Slack: Submit time-off requests directly in Slack by choosing leave type and dates.
    • Check Leave Balances: View available leave balances for each type in Slack.
    • Track Request Status: Follow the approval process directly within Slack.

    Step 7: Approve and Manage Requests

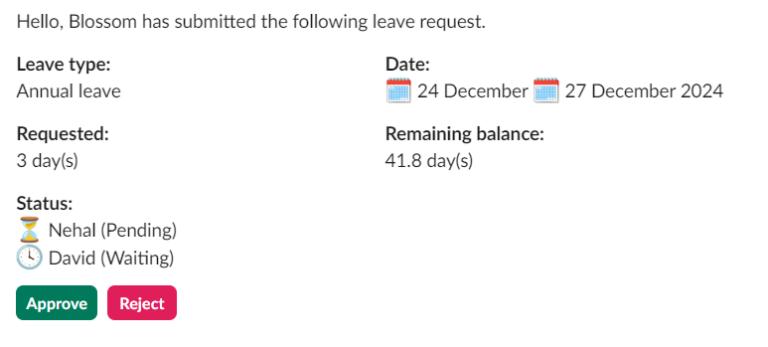
    • Receive Approval Notifications: Approvers get notified in Slack with all necessary request details.
    • View Employee Balances: Check employee leave balances before making a decision.
    • Approve or Reject Requests: Accept or deny requests directly in Slack. Multiple approvers get simultaneous notifications.
  • 9. Announcements

    In the “Announcements” section you can send messages and announcements to the entire team by just one click.

    You can do this as follows:

    1. Go to “Announcements” section.
    2. Type your message in the text box.
    3. Press “Broadcast”
    4. Then your employees will get notifications on the mobile app and emails with the announcement.

    Send Announcements:

    You have 3 options when it comes to whom you want to send the announcement

    1. All company: all employees in your company will be able to receive the content of your message.
    2. Location: select any location that exist in your company and only employees assigned to this location will be able to receive the announcement.
    3. Team: select any team you have in your company and only this team members will get the announcement content.
  • 8. Team Overview

    1. The Team Overview section gives you a full view of the submitted requests during the running month for all employees and all leave types.
    2. You will find the requests color-coded with each leave type’s color.
    3. The letters on the requests stand for the following: “D” for day off requests, “C” for compensation requests, and “H” for official holidays.
    4. You can switch back and forth between months to get an overview of previous and coming months.
    5. You can extract a report in the form of an excel sheet for any month you want.

  • 3. Teams

    A Team can be a department in the company such as PR, Marketing…etc., where you can set a manager/approver for each department, or if you have employees with different leave policies, you can use create teams with customized leave policies and add employees to them.

    You Can Add a Team as Follows:

    1. Go to “Teams” section
    2. Click “Add New Team
    3. Enter the following data:
    (Team name, The team default approver from the list of added employees)
    4. If the team has a customized leave policy, enable the “Override location’s policy” toggler, then select the team policy from the “Leave policies” drop-down menu.
    5. Save the team, then you can add employees to it from the employees’ profiles or while adding employees.

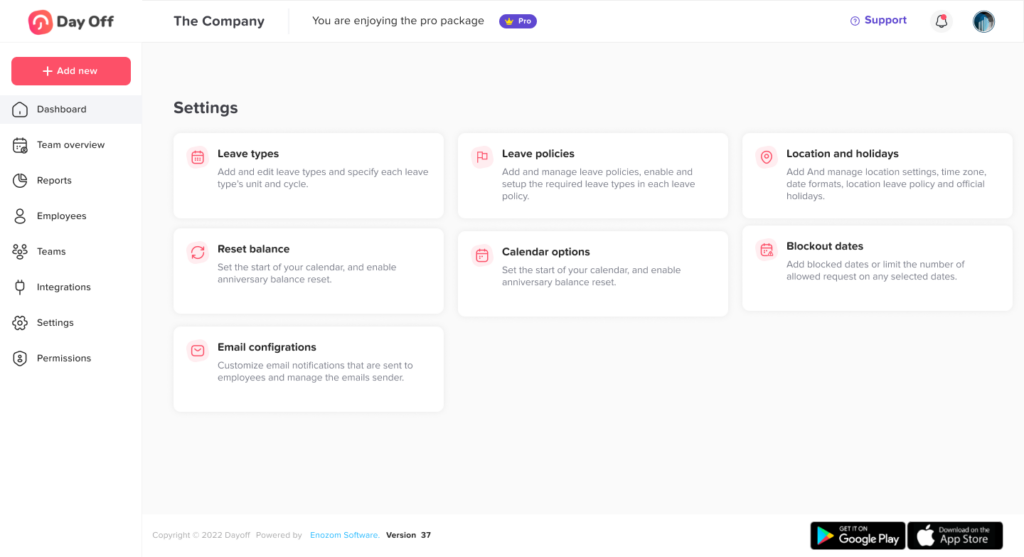
  • 1.2. Company Settings

    As the company Admin or HR manager, you have the authority to establish various settings for your company:

    1. Leave Types

    In this section, you can add and edit the various types of leave available within your organization, such as vacation, sick leave, or personal days. Customize each leave type by specifying its balance unit (like days or hours), cycle (annual, monthly), and assign a unique color code for easy identification in the system.

    2. Leave Policies

    Manage and set up the rules that govern leave usage here. This includes creating new leave policies and specifying which leave types are applicable under each policy. Customize settings such as accrual rates, Carryover, and any other conditions tailored to your organization’s requirements.

    3. Locations and Holidays

    Configure location-specific settings including time zones, date formats, and location-based leave policies. This section also allows you to input official holidays which can be automatically recognized by Google Calendar, ensuring compliance and convenience across different locations.

    4. Balance Reset

    You have the flexibility to configure the reset of employees’ leave balances to occur in a specific month of your choice. Alternatively, you can choose to reset balances on the anniversary date of each employee’s start date.

    5. Calendar Options

    You have the ability to tailor the visibility settings of the dashboard calendar, allowing you to control which data and information employees can access and view on their own dachboard.

    6. Blockout Dates

    Use this section to specify dates on which leave requests are restricted. Add blockout dates during critical periods or limit the number of leave requests that can be approved for specific dates to prevent overlapping holidays.

    7. Email Configrations

    View and customize all email templates that will be sent to approvers and employees for various scenarios. This includes emails triggered by new leave requests submitted by employees, as well as updates that allow employees to track the status of their requests. You have the option to personally craft these emails to ensure the messaging aligns with your organizational communication standards.

  • 4.2. Requests

    In the requests tab, as an admin, you can find the pending and past requests of the employee.

    Pending requests

    1. In this section, you can find the pending requests of the employee
    2. Click “View details” to view a pending request details

    History

    1. In this section, you can find the requests history of the employee
    2. Click “View details” to view a past request details
    3. As an admin, you can edit or delete approved requests and force accept or force reject.

    Edit Past Requests

    1. Click the corresponding pencil icon to the required request
    2. You will be directed to the “Submit leave request” page
    3. Enter the new request information (the leave type, start and end date if the request)
    4. Click “Submit a request”

    Delete past Requests

    1. Click the corresponding delete icon to the required request
    2. A confirmation popup will show to confirm the deletion
    3. Click “Delete”, then the used balance will be added back to the employee’s balance

  • 2. Employees

    Here you can find the employees list showing the following:

    Activated list

    1. Employee’s name
    2. Employee’s current year with the start and end dates of the balance validity
    3. Approvers
    4. Team
    5. Location
    6. Leave policy
    7. Status
    8. Total days
    9. Total hours
    10. Actions (View profile, Deactivate employee, Delete employee)

    Filters

    You can filter employees by the following:

    1. Name
    2. Team
    3. Leave policy
    4. Location
    5. Role

    You can filter with last year, this year, next year to check the employees’ balance.

    Deactivated list

    You will find the employees you deactivated them in this list, by keeping their previous data in dashboard and reports, and you won’t pay for them anymore.

    If you restore them, they will be activated with the last balance they were having before deactivation.

    Import Employees

    You can import employees by downloading an excel file template, fill the required information then re-upload the file.

    Add Employees

    You can add employees individually either by using email or mobile.

  • 7.5. Accrual Report

    The Accrual report shows the details of balance accruals for each employee.

    Filters

    The report can be filtered by the following:

    1. Employee’s name
    2. Team
    3. Leave type
    4. Location
    5. Leave policy

    Report data

    The report shows the following data:

    1. Employee’s name
    2. Leave policy
    3. Leave type
    4. Quota
    5. Next accrual date
    6. Next accrual amount
    7. Earned balance
    8. Used balance

    Export

    Click “Export excel” to export the required data in the form of an excel sheet.

  • 7.4. Carry-Over Report

    The Carrry-over report shows the details of the carried-over balances from past years, and the used and expired in following years.

    Filters

    The report can be filtered by the following:

    1. Employee’s name
    2. Team
    3. Leave type
    4. Location
    5. Leave policy

    Report data

    The report shows the following data:

    General information

    1. Employee’s name
    2. Leave policy
    3. Leave type

    Last year’s balance

    1. Remaining balance
    2. Carried-over balance
    3. Expiry date

    This year’s balance

    1. Used carryover balance
    2. Expired
    3. Remaining

    Export

    Click “Export excel” to export the required data in the form of an excel sheet.

  • 7.3. Totals Report

    The Totals report shows the total day and total hours used by each employee within a selected date range

    Filters

    The report can be filtered by the following:

    1. Employee’s name
    2. Team
    3. Leave type
    4. Request type (day off or compensation request)

    Report data

    The report shows the following data:

    1. Employee’s name
    2. Total used days
    3. Total used hours

    Export

    Click “Export excel” to export the required data in the form of an excel sheet.

    You have the flexibility to search the data according to any customized timeframe you prefer.