Archives: Knowledge Base

  • 7.2. Detailed Report

    The Detailed report shows all of the submitted requests by all employees within a selected date range.

    Filters

    The report can be filtered by the following:

    1. Employee’s name
    2. Team
    3. Leave type
    4. Location
    5. Leave policy
    6. Request status

    Report data

    The report shows the following data:

    1. Employee’s name
    2. Leave type
    3. Request start and end dates
    4. Requested time off duration
    5. Request reason
    6. Request status

    Export

    Click “Export excel” to export the required data in the form of an excel sheet.

    You have the flexibility to search the data according to any customized timeframe you prefer.

  • 7.1. Balances Report

    The Balances report shows an overview of the total and used balance of each leave type by each employee, as well as the total days and total hours each employee has in general.

    Filters

    Data can be filtered by the following:

    1. Leave policy as the main filter
    2. Location
    3. Team

    Report data

    1. List of employees with the start and end dates of their current year.
    2. Leave types with the total and used balance by each employee of each leave type they have.
    3. Sum of used and remaining days and hours for all leave types, excluding leave types with infinite balance and monthly cycles.

    Export

    Click “Export excel” to export the required data in the form of an excel sheet.

    Year filter

    You have 3 options when it comes to timely filter the data included in the report
    1. Last year
    2. This year
    3. Next year


  • 7. Reports

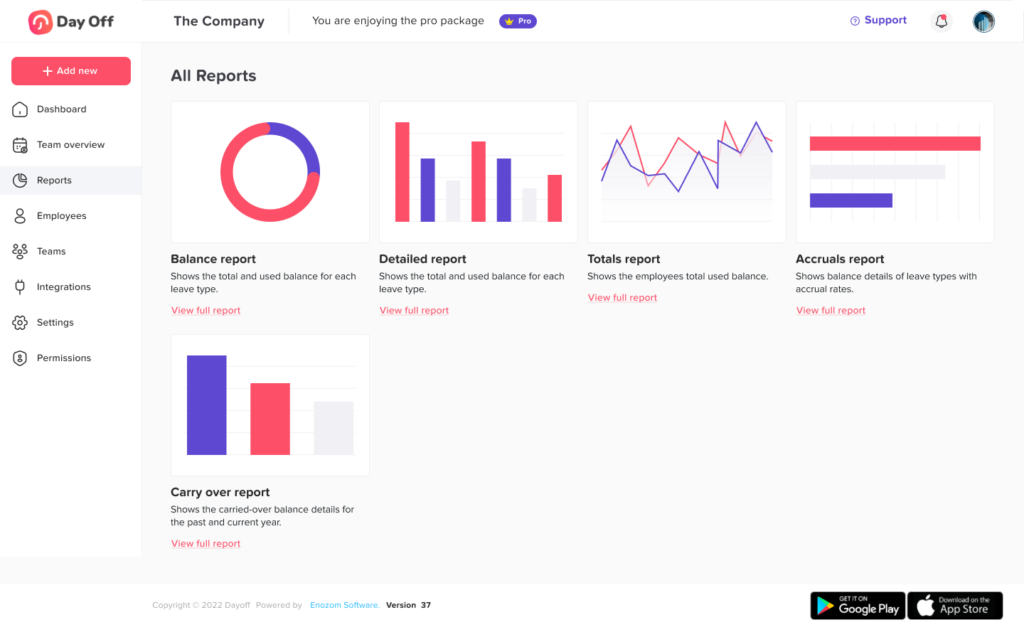
    You can view and export 5 different reports that give you an overview of different aspects of your employees’ balance. Day Off provides the following reports:

    Balances report

    Shows an overview of the total and used balance of each leave type by each employee, as well as the total days and total hours each employee has.

    Detailed report

    Shows all of the submitted requests by all employees within a selected date range.

    Totals report

    Shows the total used days and hours by each employee within a selected date range.

    Accruals report

    Shows the details of balance accruals for each employee.

    Carryover report

    Shows the details of the carried over or rolled over balances from previous year to the following year.

  • 6. Admin Dashboard

    The dashboard consists of two sections, calendar, and pending requests.

    Calendar

    1. The calendar shows employees’ approved requests as well as the official holidays.
    2. You can filter the calendar by location or by team, to view only the requests of employees in the required location or team.
    3. As an admin, you can click on any of the approved requests to view its details.
    4. You can change the calendar view to Month, Week, Day, or a list with all of the month requests.
    5. From the arrows on the left, you can switch back and forth between months.

    Pending Requests

    1. This section shows a list of pending leave requests.
    2. Click “View details” to view the request details.

    Request Detail

    A popup will open showing the following request details

    1. Employee’s name and picture
    2. Leave type
    3. Start and end dates or times of the request
    4. Number of requested days or hours
    5. A timeline showing the date when the request was submitted, and the dates when the approvers accepted or rejected the request. The timeline also shows the status of the request on the approvers’ side whether it’s pending, rejected, or accepted.
    6. The request reason if the reason is provided.
    7. The employee’s leave types and balances.

    Admin Actions

    Click the gear icon on the top right, you will find the following actions

    1. Edit request
    2. Delete request
    3. Force Accept, where any admin can override other approvers’ actions and accept the request.
    4. Force Reject, where any admin can override other approvers’ actions and reject the request.

  • 5. Bulk Actions

    From the employees’ list, you can select a group of employees to perform bulk actions such as:
    adding time off or compensation requests, assigning them to teams or locations, or deleting employees.

    Filters

    1. Click “Show filters” to filter employees.
    2. You can filter employees by (name, team, leave policy, or location).
    3. Check the checkbox next to each employee to select them or click the top checkbox to select all of the employees.

    Add Day Off

    1. To add days off in bulk, employees must be under the same policy. Use the filters to filter employees by leave policy.
    2. Select the required employees.
    3. Click “Add day off”.
    4. A popup will show where you can enter the request details.
    5. Click “Submit request”
    6. A review popup will show where you can review the status of the request and the employees’ balance before and after the request.
    7. Click “Confirm” to submit the request, or “Back” to go to the previous step and edit the request details.

    Add Comp Off ” Compensation”

    1. To add compensation in bulk, employees must be under the same policy. Use the filters to filter employees by leave policy.
    2. Select the required employees.
    3. Click “Add comp off”.
    4. A popup will show where you can enter the request details.
    5. Click “Submit request”
    6. A review popup will show where you can review the status of the request and the employees’ balance before and after the request.
    7. Click “Confirm” to submit the request, or “Back” to go to the previous step and edit the request details.

    Delete

    1. Select the required employees.
    2. Click “Delete”.
    3. A popup will show to confirm the deletion.
    4. If you would like to keep the employees’ previous requests and balance data in the reports, click “Delete employee” directly.
    5. If you would like to delete all of the employees’ previous requests and balance data, check the checkbox ” Delete employee leave requests and all related data”, then click “Delete”

    Assign to Team

    You can select a group of employees and assign them to a team.

    1. Select the required employees.
    2. Click “Assign to team”
    3. Select the required team.
    4. Adding employees to a team may change the leave policy and approver of the employee.
    5. Click confirm to review the policy change for each of the selected employees.
    6. You can review the leave policy, total days, and total hours before and after changing the team.
    7. You can review the changes or unselect some of the employees and then confirm.
    8. Afterward, each employee’s team, balance, and approver will be updated.

    Assign to Location

    1. You can select a group of employees and assign them to a location.
    2. Select the required employees.
    3. Click “Assign to location”
    4. Select the required location.
    5. Changing employees’ location may change the leave policy of the employees.
    6. Click confirm to review the policy change for each of the selected employees.
    7. You can review the leave policy, total days, and total hours before and after changing the location.
    8. You can review the changes or unselect some of the employees and then confirm.
    9. Afterward, each employee’s location and balance will be updated.

    Assign to Policy

    1. You can select a group of employees and assign them to a different leave policy.
    2. Chose the required leave policy that matches the employees’ needs from the menu.
    3. It will show you the changes that will happen to the total days and total hours for the employees you have selected, waiting for you to confirm your action.
  • 4.6. Add Requests for Employees

    As an admin, you can add day off requests for employees from their profile

    1. Go to an employee’s profile
    2. From the buttons under the employee’s profile picture, click “Add day off” to add time off requests
    3. Click “Add comp off” to add compensation requests
    4. Requests that are added by admins are automatically accepted and added directly to the requests history section in the employee’s profile

  • 4.5 Policy

    In the policy section on the employee’s profile, you will be able to:
    1. You can see the name of the leave policy that the employee is following based on his location or team
    2. The second option is to assign the employee to any custom policy you have in your company that matches his needs and you can create a leave policy for a specific employee in your company.
    3. Click on the leave toggler and chose the required leave policy then click on ” save changes.”
    4. You will have an overview of the changes and modification that will happen to the employee’s balance of each leave type he has, if you are sure that this is the perfect policy for the employee click on confirm.

  • 4.4. Team

    In this tab, you can edit the employee’s team and approvers

    Team

    Adding an employee to a team can change the employee’s leave policy. The default case is that the employee gets the leave policy of their location, but adding the employee to a team with a custom policy will change the employee’s location policy to the team policy.

    Select Team

    1. Select the required team from the menu
    2. Click “Save changes”
    3. If the team has a custom policy, a popup will show with the change in leave types and balances that the employee will get.

    Remove Team

    1. Click the “x” next to the team in order to remove it.
    2. If the removed team has custom policy, the employee will get the policy of their location.
    3. Select the required team from the menu
    4. Click “Save changes”
    5. A popup will show with the changes in leave types and balances that the employee will get.

  • 4.3. Balance

    Here you can view and edit the employee’s leave types and balances.

    View Balance Details

    You can find each leave type assigned to the employee with the balance breakdown as follows:

    1. Leave type name and unit
    2. Initial balance or Accruals/Quota
    3. Comp-off (compensation) balance
    4. Carryover balance
    5. Used
    6. Used/Total
    By clicking the eye icon next to a leave type, you can view the leave type breakdown with more details

    Customize Employee’s Balance

    You can customize each employee’s balance separately from their profiles as follows:

    1. Enable the ” Customize employee’s balance” toggler
    2. Edit buttons will show next to each leave type
    3. Click the edit button of the required leave type to be edited
    4. A popup with the leave type balance details will open
    5. Delete the original amount, enter the new one then click “Save changes”

  • 4.1. Employee Information

    Edit Name, Email, or Phone

    Just click the required information and it will be editable, then click “Save changes” after you finish.

    Employee name

    Click on editing the employee name, then click “Save changes” after you finish.

    Joining Date

    The joining date will be the employee’s balance reset date in case of “Allow employees’ balance to reset on their anniversaries” option, If not, it will be an information saved for the employee hiring date.

    Role

    You can choose from the drop menu the role you want to assign it to the employee, whether an admin or an employee role, also, you will find the roles you can create from “Permissions” 

    Time Zone

    chose the appropriate time zone for the employee from the menu.

    Location

    Employee’s location defines the leave policy that is assigned to the employee. Changing the employee’s location will change the leave policy of the employee.

    When selecting a different location, a popup will show the changes in leave types and balances that will happen to the employee. Review carefully before confirming the location change.