1.2.2. Leave Policies
For varying groups of employees with different leave policies, you can establish leave policies to be assigned to the employees as follows:
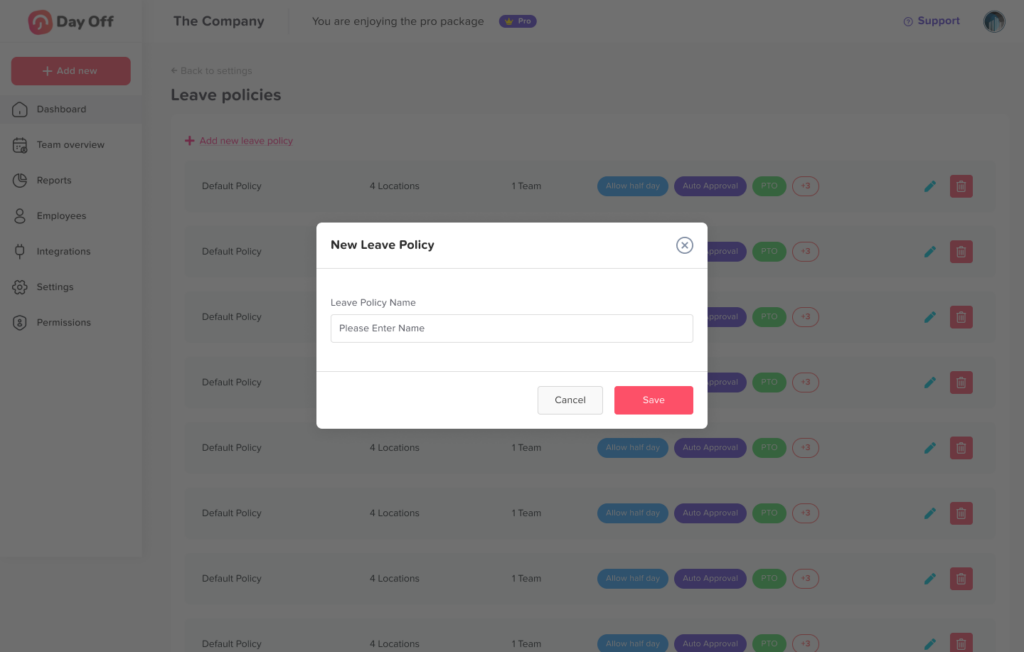
1. Access "Settings," then select "Leave policies."
To begin creating or editing leave policies, Locate the “Settings” section, which is often where various system configurations are managed. Under the “Settings” menu, find the option labeled “Leave policies.” This is where you can set up and manage leave policies that apply to different groups of employees.
2. Choose "Add new policy."

Once you’re in the “Leave policies” section, look for a button that allows you to create a new policy, typically labeled as “Add new policy.” Clicking this will open a new screen or form where you’ll begin the process of establishing a new leave policy for your organization. This step is crucial for ensuring that distinct policies can be applied to different employee groups.
3. Name the policy and proceed by clicking "Next.
At this stage, you need to give the leave policy a clear and descriptive name. The name should be representative of the group of employees or the type of leave the policy is intended for, such as “Full-time Employee Leave Policy” or “Contractor Leave Policy.” Once you’ve entered the name, click “Next” to move to the next step of the setup process. This helps keep your policies organized and easily identifiable.
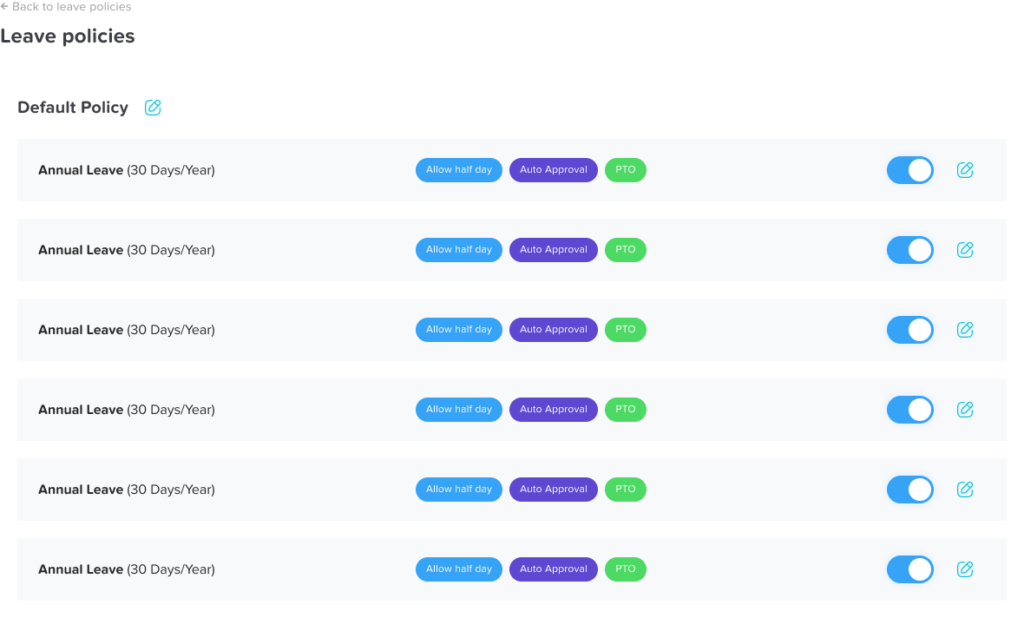
4. You'll see a list of leave types you previously created.

The system will now display a list of all the leave types you’ve set up earlier, such as annual leave, sick leave, or maternity leave. These leave types are customizable and should reflect the different types of time off your organization offers. It’s important to review this list to ensure that the relevant leave types are available before proceeding to assign them to the policy.
5. Activate the specific leave types you wish to include in the policy.
From the list of leave types, turn the activation toggler on for the specific ones that will apply to this new policy. For example, for full-time employees, you might activate vacation leave, sick leave, and personal leave. By activating these leave types, you’re determining which kinds of leave employees under this policy can request or be granted.
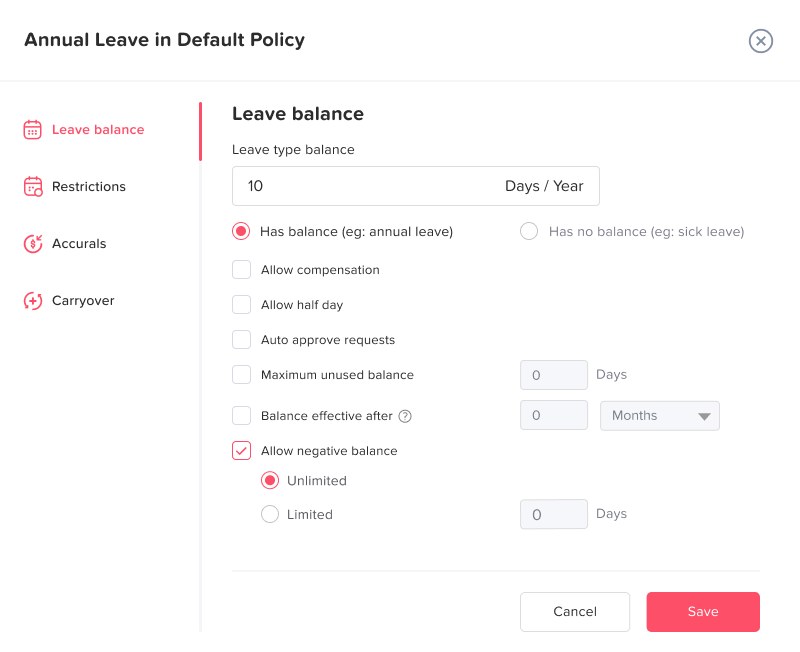
6. Choose the settings for each leave type within the policy and click "Save."

After selecting the leave types, you will need to configure the specific settings for each one. This may include defining accrual rates (how much leave an employee earns over time), the maximum amount of leave that can be carried over from year to year, and whether leave requests require manager approval. These settings should align with your company’s policies and the needs of the employee group this policy covers. Once all leave types are configured to your satisfaction, click “Save.”
7. Once you've set up the necessary leave types within the policy, click "Update" to confirm your selections.
After reviewing and setting up all the leave types and their configurations within the policy, perform a final check to ensure everything is accurate. Clicking “Update” at this point will lock in your selections, officially creating the leave policy. This policy will then be ready to assign to employees, ensuring they have access to the correct types of leave with the appropriate rules in place.