





You can filter reports by date in Day Off. Date filtering helps you analyze leave data within a selected timeframe, such as a month, quarter, or custom range.
How to Filter Reports by Date
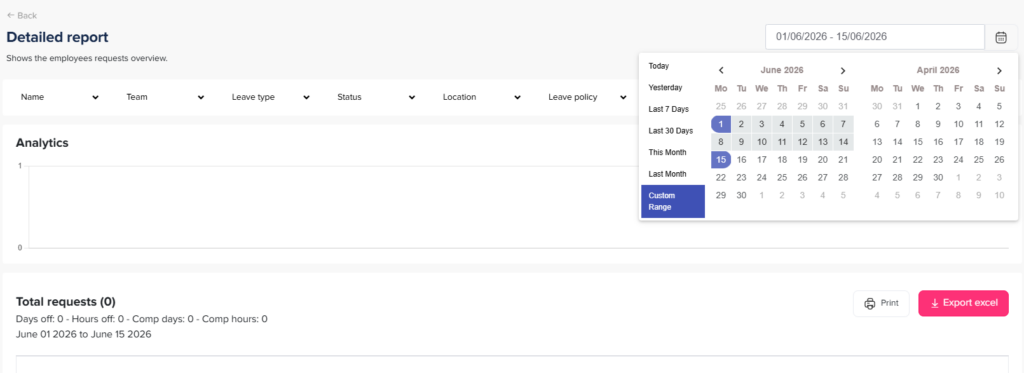
To filter a report by date:
- In the left-hand menu, go to Absence → Reports
- Open the report you want (e.g., Detailed Report or Total Report)
- Select your desired date range
- Apply the filter to update the results
Which Reports Use a Date Range
Date filters matter most in reports that look at activity over time:
- Detailed Report: lists all requests submitted within the period, with their statuses.
- Total Report: shows the total days or hours each employee used during the period.
For a full overview of each option, see the types of reports in Day Off.
Useful Date Ranges
The right range depends on your goal. For example:
- One month: check time off before you run payroll.
- One quarter: review leave trends in team or performance check-ins.
- A full year: compare usage against your fiscal year or calendar year.
- A custom range: focus on a project, a busy season, or a holiday period.
Combine Dates with Other Filters
A date range becomes even more useful when you pair it with other filters. For instance, you can view one team’s sick leave for the last quarter. Learn how to customize reports by team or leave policy.
Once the results look right, you can export the report and share it with payroll or leadership.
Tips for Accurate Results
- Double-check the start and end dates before you apply the filter.
- Use the same range each time you compare periods, so the numbers stay consistent.
- Remember that long requests may start before or end after your selected range.
- If a report looks empty, widen the range or clear other filters.
In short, a quick check of your dates saves time and avoids confusing results later.