
Archives: Knowledge Base

  • How can I assign approvers for an employee?

    You can easily assign approvers for each employee in Day Off through the web platform, using a flexible approval workflow.

    Steps to Assign Approvers

    To set approvers for an employee:

    • Go to the Employees Overview
    • Select the employee
    • Open their profile
    • Go to team
    • Assign approvers for:
      • Step 1
      • Step 2 (optional)
    • Add one or multi approvers in each step
    • Save your changes
    Capture 60 Knowledge Base

    How It Works

    • The employee’s requests will be sent to Step 1 approvers first
    • Once any approver approves, the request moves to the next step (if configured)
    • After the final step is approved, the request is completed

    Flexible Setup

    • You can assign multiple approvers per step
    • Only one approval per step is required
    • You can also add watchers for visibility without approval access
  • Whats the difference between 2 steps approvals and multi approvers in single step?

    In Day Off, both options allow you to involve multiple approvers in the approval process but the workflow behaves differently.

    2 Step Approval Workflow

    This setup creates a sequential approval process with two levels:

    • Step 1 approvers review the request, once approved, it moves to Step 2 approvers
    • The request is only fully approved after completing both steps

    Even if there are multiple approvers in each step, only one approval per step is needed to move forward.

    Multiple Approvers in a Single Step

    This setup keeps everything in one level of approval:

    • Multiple approvers are assigned in the same step
    • The request is sent to all of them at once
    • Any one approver can approve, and the request is finalized immediately
  • What is the Difference Between a Leave Policy and a Leave Type?

    Leave policies and leave types are closely connected, but they are not the same. Understanding the difference helps you set up your system correctly and avoid confusion.

    In simple terms:

    • A leave type defines what kind of leave employees can take
    • A leave policy defines how that leave works

    What is a Leave Type?

    Group 1000014688 1 1 Knowledge Base

    A leave type is a category of time off that employees can request.

    Common examples include:

    • Vacation leave
    • Sick leave
    • Personal leave
    • Unpaid leave
    • Paid Time Off (PTO)

    Think of leave types as the labels or categories of leave.

    Each leave type can have its own settings in different policies, such as:

    • Number of days/hours available
    • Whether it is paid or unpaid
    • Whether approval is required
    • Whether documents are needed (e.g., sick note)

    For example:
    “Sick Leave” might require a document, while “Vacation Leave” does not.

    What is a Leave Policy?

    Locations 2 1536x1175.png 7 Knowledge Base

    A leave policy is a complete set of rules that controls how leave works for a group of employees.

    It brings multiple leave types together and defines how they should be used.

    A leave policy includes things like:

    • Which leave types are available
    • How many days/hours employees get for each type
    • How leave is earned (accrual rules)
    • What happens to unused leave (carryover rules)
    • Request rules (notice period, approvals, restrictions)

    Think of a leave policy as the full framework or system that organizes leave.

    How Leave Types and Leave Policies Work Together

    Leave types and leave policies are designed to work hand in hand to create a complete leave management system.

    • Leave types are the building blocks (the different kinds of leave)
    • Leave policies organize and control how those leave types are used

    Important:
    Before creating a leave policy, you need to create your leave types first, since policies are built using those types.

    Once your leave types are ready, you can create a leave policy and:

    • Select which leave types to include
    • Define rules for each type (balances, approvals, accruals, etc.)
    Annual Leave in Default Policy 1 Knowledge Base

    Simple Example

    Let’s say your company has already created these leave types:

    • Vacation
    • Sick Leave
    • Personal Leave

    Next, you create a leave policy called “Full Time Employees”, where you define:

    • 21 vacation days per year
    • 10 sick leave days
    • Rules for approvals, accruals, and carryover

    In this case:

    • The leave types are the categories employees can choose from
    • The leave policy defines how those categories behave and what rules apply

    Key Difference (Quick Summary)

    • Leave Type: What kind of leave is this?
    • Leave Policy: How does leave work for employees?

    Why This Matters

    Understanding this difference helps you:

    • Set up your system in the correct order (types first, then policies)
    • Apply the right rules to the right employees
    • Keep your leave structure clear and easy to manage
    • Avoid confusion for both admins and employees

    A simple way to remember:

    • Leave types = the different kinds of time off
    • Leave policies = the rules that manage those types

    When both are set up properly, everything works together smoothly, allowing Day Off to automatically handle requests, balances, and approvals with minimal effort.

  • How many approvers can I set per employee?

    In Day Off, you can assign multiple approvers per employee

    Multi Step Approval Workflow

    Day Off supports a 2 step approval process, where each step can include multiple approvers:

    • Step 1: One or more approvers
    • Step 2: One or more approvers

    How Multiple Approvers Work

    Within each step:

    • You can assign multiple approvers
    • Any one of the approvers can take action

    Once one approver approves, the request automatically moves to the next step

    This means:

    • You don’t need all approvers to approve
    • One approval is enough to proceed
  • Whats the difference between approvers and watchers?

    In Day Off, both approvers and watchers are involved in the leave request process but they have very different roles.

    Approvers

    Approvers are responsible for taking action on leave requests.

    They can:

    • Approve or reject requests
    • Receive notifications when a request is submitted
    • Control whether a request is accepted or not

    Approvers are a key part of the approval workflow and directly impact the request status.

    Watchers

    Watchers are included for visibility only.

    They can:

    • View leave requests
    • Receive notifications about requests
    • Stay informed about team activity

    However, they cannot approve or reject requests.

  • How do I create a leave policy?

    Creating a leave policy in Day Off helps you clearly define how time off works in your company. You can decide how many days/hours employees get, what types of leave are available, and what rules apply, all in one place.

    Don’t worry, everything is simple and flexible, and you can adjust it anytime.

    Step 1: Go to Leave Policies

    Settings 3 Knowledge Base

    Start by navigating to where all your policies are managed:

    • Go to Settings
    • Click on Leave Policies
    • Click Add new leave policy

    This will open a new window where you can start building your policy.

    This page shows all your existing policies, so you can always come back later to edit or create new ones

    Step 2: Enter Policy Name

    Add new leave policy Knowledge Base

    Now give your policy a name.

    Enter a name like:

    • Full Time Employees
    • Part Time
    • Remote Team

    Choose a name that clearly describes who this policy is for.

    This will help you stay organized, especially if you have multiple policies.

    • Click Next to continue

    Step 3: Add and Select Leave Types

    Group 1000014867 1 Knowledge Base

    Here, you decide what types of leave are included in this policy.

    • Turn on the leave types you want, such as:

      • Vacation Time
      • Sick Leave
      • Paid Time Off
      • Personal Leave

    • You can turn off any leave types you don’t need
    • Click the edit icon to customize each one

    There’s no limit, you can include as many leave types as your company needs.

    This step helps you tailor the policy to match your company’s structure.

    Step 4: Configure Leave Balance

    Capture 53 Knowledge Base

    Now you decide how much leave employees get.

    For each leave type:

    • Choose:
      • Limited balance: set a fixed number (e.g., 20 days per year)
      • Unlimited balance: no limit (commonly used for sick leave)
    • Enter the number of days or hours (if limited)
    • Optionally apply this to all employees in the policy

    This step defines how much time off employees are allowed to take.

    Take your time here, this is one of the most important parts of the policy.

    Step 5: Set Additional Rules

    Capture 54 Knowledge Base

    In this section, you can control how flexible or strict your leave policy is, depending on your company’s rules and culture.

    You can enable the following options:

    • Allow half days: Employees can request leave for half a day instead of a full day.
    • Auto approve requests: Leave requests are approved automatically without requiring manager action.
    • Allow negative balance: Employees can request leave even if they don’t have enough balance. Their remaining balance will go into negative, meaning they are borrowing leave from future allocations.
    • Balance effective after: Employees can only start using their leave balance after a specified period (e.g., after probation).

    These settings give you the flexibility to align the system with real-life company policies.

    For example, some companies allow employees to go into a negative balance as a form of advance leave, while others enforce strict limits and do not permit this.

    Step 6: Add Restrictions (Optional)

    Capture 59 Knowledge Base

    This step lets you add conditions to leave requests.

    You can require:

    • A document (like a medical certificate)
    • A reason for the leave
    • Request Notice Period
      Set how many days in advance leave must be requested
      Helps teams plan ahead
    • Late Submission Period
      Allow requests after the leave date
      Useful for emergencies
    • Count Holidays in Leave Period
      Decide if holidays are deducted from leave balance
      Keeps calculations consistent
    • Count Weekends in Leave Period
      Choose whether weekends count as leave days
      Matches your company policy
    • Request Period
      Set minimum and maximum leave duration
      Prevents very short or very long requests

    Step 7: Set Accrual Rules (Optional)

    Capture 57 Knowledge Base

    If your company provides leave gradually over time, you can enable accruals instead of giving the full balance upfront.

    • Turn on Accruals
    • Choose how often leave is added:
      • Weekly
      • Monthly
      • semi-monthly
      • bi-weekly
    • Select when the leave is credited:
      • At the start of the cycle
      • At the end of the cycle

    Example:
    Instead of giving 24 days at once, employees earn 2 days each month.

    Step 8: Configure Carryover (Optional)

    Capture 58 Knowledge Base

    This setting lets you decide what happens to unused leave at the end of a period.

    • Enable Carryover to allow unused leave to roll over
    • Choose:
      • Unlimited carryover: no limit
      • Limited carryover: set a maximum (e.g., 5 days)
    • Optionally set an expiration for carried leave

    Why it matters:
    Helps you control whether unused leave is saved for later or expires based on your company policy.

    Step 9: Save Your Policy

    • Click Save

    Your leave policy is now created and ready to use.

    Step 10: Assign the Policy

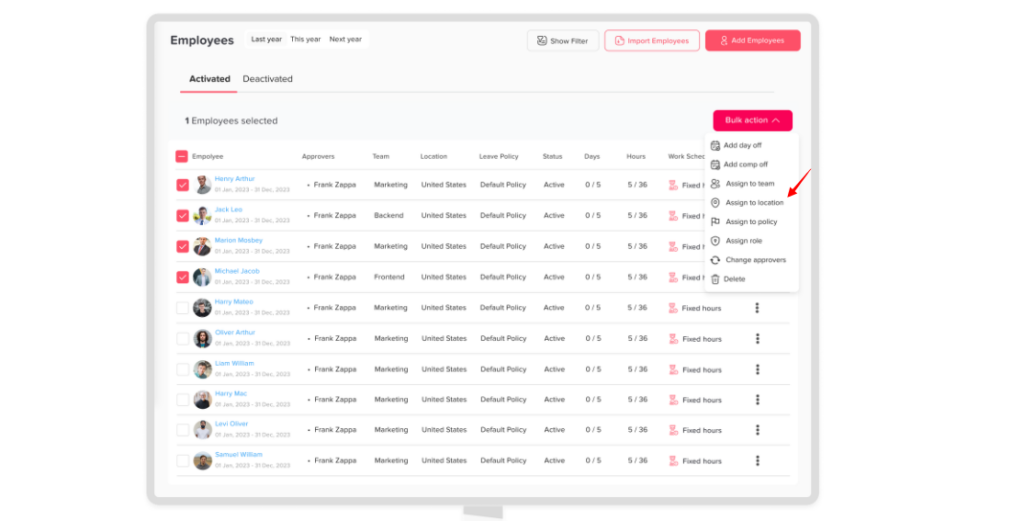
    Group 1171275978 1536x1091.png 3 Knowledge Base

    After creating your policy, you’ll need to assign it so it takes effect.

    • Locations: automatically applies to all employees in that location
    • Teams: useful when different teams have different leave rules
    • Individual employees: for fully customized setups

    This flexibility helps you apply the right policy to the right people with ease.

    Creating a leave policy in Day Off is simple once you break it down step by step. You have full control over how time off works, from balances and rules to approvals and flexibility.

    Once everything is set up, Day Off takes care of the rest automatically, saving you time and keeping everything organized.

  • Does Day Off support Microsoft SSO?

    Yes, Day Off supports Microsoft Single Sign On (SSO), allowing your team to log in securely using their Microsoft work accounts.

    What This Means

    With Microsoft SSO enabled:

    • Employees can sign in using their Microsoft accounts
    • No need to create or manage separate passwords
    • Authentication is handled through your organization’s Microsoft system

    How It Works

    Once SSO is activated:

    • A Microsoft login option appears on the login page
    • Users simply sign in with their work account
    Capture 55 Knowledge Base
  • How to enable Single Sign on (SSO)?

    SSO allows employees to access Day Off without creating separate passwords. They can log in using their existing Microsoft work accounts, making access faster and more secure.

    Steps to Enable SSO

    To set up SSO in Day Off:

    • Go to Security on the web version
    • Navigate to the SSO section
    • Enable the SSO
    • Click on Setup for microsoft
    • Follow the setup instructions and grant required permissions
    • Save and activate

    Once enabled, users can sign in using their Microsoft accounts.

    Group 1000001492 Knowledge Base

    How It Works for Users

    • Employees will see the Microsoft login option on the login page
    • They can log in using their work Microsoft account
    • No need to create or remember separate passwords
    Capture 55 Knowledge Base
  • What is custom domain in Day Off?

    A custom domain in Day Off allows your company to access the platform using a personalized web address instead of the default Day Off URL.

    What Does It Mean?

    Instead of using the standard link (tracker.day-off.app), you can set up your own branded URL such as:

    yourcompany.day-off.app

    This makes access more professional and aligned with your company identity.

    Why Use a Custom Domain?

    Using a custom domain helps you:

    • Create a branded experience for your team
    • Make the platform easier to recognize and access
    • Build trust with employees using a familiar company name
    • Simplify sign on by having a unique company specific link

    How to Enable a Custom Domain

    To set up your custom domain:

    • Go to Security on the web version
    • Find the Custom Domain section
    • Enter your desired domain (e.g., yourcompany.day-off.app)
    • Check availability
    • Save and activate

    Once enabled, all users will be logged out and will be required to use the custom domain to login.

    Capture 52 Knowledge Base